

8/5/2020
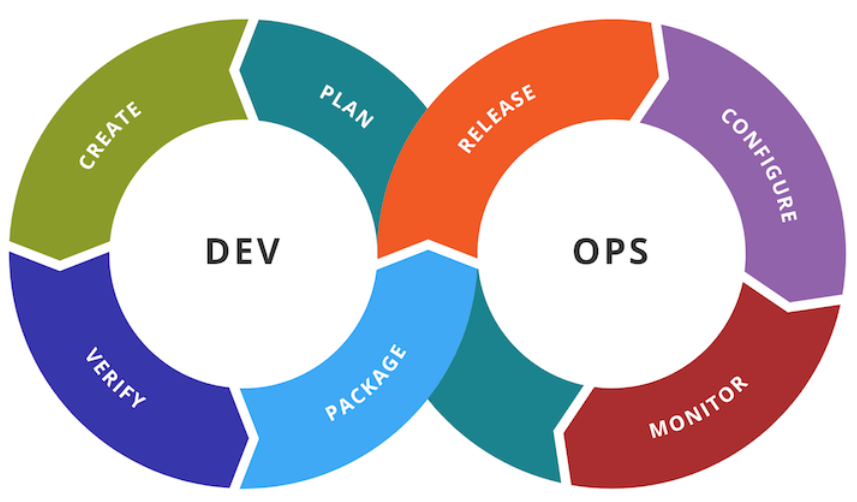
What do you think about when you hear the word continuous? Since you're reading a CI/CD blog post, maybe you're thinking of the general DevOps infinity loop. Makes sense, huh? Developers continuously developing, building, and deploying code via pipelines without stopping in an infinite cadence, right?
Being a math geek, when I think of continuous, I think of a continuum of numbers packed infinitely close together like the appetite of a growing black hole gobbling up stars and mass for the rest of eternity. In fact, one of my favorite thought experiments revolving around the continuum of numbers and infinity is Zeno's Paradox. Imagine you're running a marathon. This 26.2 mile race is such a long run that you decide you will break it down into separate goals to complete in stages. First you want to make it to the halfway point at 13.1 miles. You're exhausted when you get to 13.1 miles, but you don't want to quit. You're thinking "if only I could make it halfway between here and the finish-line" so now your next goal is to run to the 19.65 mile marker. Ahh, just 6.55 more mile to go. Now let's just get to the next halfway point at 22.925 miles. These distances are getting shorter and shorter, we should get to the finish-line in no time! The next halfway point is at 24.5625 miles, and then 25.38125 miles, and then 25.790625 miles, and then 25.9953125 miles, and then 26.097546875 miles, and then... Wait a minute! By this measure, we'll never get to the finish-line. We'll only ever get infinitely close!

Sometimes, I feel this way when developing software, i.e. continuously develop and only get infinitely closer to the end goal. Fortunately, there are methodologies such as Agile which make this not sound so bad with the caveat that you may pull your hair out having to fix some half-baked code over and over across sprints while waiting for other teams to deliver their small building blocks of the project that your code needs to be successful. So what is this CI/CD stuff anyways?
Continuous Integration
Developers like to write code and push their frequent commits up to the develop branch as much as possible. But what does it take to get to this point? You may have to compile or package your code with various flags and parameters. You might also need to run your code against several test cases to make sure nothing is broken whether in your new code or in the rest of the code base. Maybe you need to run your code through some security check to make sure you don't have any plaintext secrets or third party malware packaged into your binaries. Much of this can and should be automated so that the developer just needs to push to the develop branch and an automated Continuous Integration pipeline kicks off to carry the code through the building, testing, and whatever other checking stages your code is required to go through.
Continuous Deployment
Developers like it even better when their code gets merged into the main branch. When you get to this point, then maybe your code has gone through all of the testing and peer reviews, etc. and has passed everything with flying colors. Now we are ready to deploy your code to it's final runtime environment, and of course this is completely automated as it should be!
CI/CD in the Serverless World
If you have ever written a Python script on your local machine and wanted to convert it into a serverless AWS Lambda Function, then you may faced a small nightmare in doing so manually. You have to structure your project directory in a specific way and ZIP it. Oh, and if you're working on a Windows machine and your project included any 3rd party libraries that were compiled in C, such as numpy, then you've got to hop onto a Linux box and re-create your project there before you upload the zipped package into the Lambda console.
Fortunately, there are tools out there that do all of this for you and make this process extremely easy. They even generate and work with CloudFormation on the backend. The tools that come to mind are SAM CLI and the Serverless Framework. Now when I first used these two tools back in early-mid 2019, the Serverless Framework had a few more features that I liked, and I had been using it ever since. However, I think SAM CLI has matured a bit more since then, and surprisingly has just become GA in July 2020 (surprising because somehow I though it had already been GA when I used it in 2019.)
Keep in mind when using these tools, they both use Docker Containers on the backend as well, so you may also need to ensure that you have Docker installed on your local machine. However, you could get around this by strictly using something like GitLab CI/CD like we will see below.
Maybe I should give SAM CLI another shot sometime soon, but today we will have a look at how we can use the Serverless Framework to develop and deploy a serverless microservice in a CI/CD fashion. In particular, we will use the same Python program that we used in the previous post (Demystifying AWS API Gateway Deployments Using CloudFormation Templates).
The Serverless Framework
The Serverless Framework includes a simple to use interactive CLI that will ask you a couple of questions about what kind of project you want to create, and will generate a skeleton template for you to get started with. Also, keep in mind that when installing the Serverless Framework, it will use the same secrets you use with your AWS CLI configuration. Assuming you have the Serverless Framework installed and configured on your machine, you can run the following command to create a new project:
serverless
You should see some interactive output similar to:
Serverless: No project detected. Do you want to create a new one? Yes
Serverless: What do you want to make? AWS Python
Serverless: What do you want to call this project? tsf-start-stop-ec2s

Project successfully created in 'tsf-start-stop-ec2s' folder.

You can monitor, troubleshoot, and test your new service with a free Serverless account.

Serverless: Would you like to enable this? No
You can run the serverless command again if you change your mind later.
At this point, you might have a look at the code from my GitLab repo. The handler.py is the code for the Lambda Function (the exact code from the last blog post (Demystifying AWS API Gateway Deployments Using CloudFormation Templates). The serverless.yml file is the template used by the Serverless Framework to package and deploy your entire serverless project to AWS. In less than 75 lines of serverless.yml template, we recreate the exact project we created in our last blog post which took 279 lines of CloudFormation template. For a complete listing of properties you can set in your serverless.yml file with regards to configuring an extensive AWS serverless project, see this reference from the Serverless Framework's documentation.
Our particular serverless.yml file can be broken into two main blocks. A "provider" block which include information around our API Gateway endpoint, and sub-block containing information regarding the needed IAM role to run the project.
# serverless.yml

provider:
  name: aws
  runtime: python3.8
  apiName: start-stop-ec2s
  endpointType: REGIONAL
  logRetentionInDays: 30
  apiKeySourceType: HEADER
  apiKeys:
    - name: ${opt:stage}-start-stop-ec2s
      description: Api key for starting or stopping EC2s
  usagePlan:
    quota:
      limit: 50
      period: MONTH
    throttle:
      burstLimit: 10
      rateLimit: 5
  tags: # Optional service wide function tags
    Name: "APIG-Lambda-start-stop-EC2s"
  deploymentBucket:
    name: airpa-serverless-deployment-bucket
    blockPublicAccess: true

# you can overwrite defaults here
  stage: dev
  region: us-east-1

# you can add statements to the Lambda function's IAM Role here
  iamRoleStatements:
    - Effect: "Allow"
      Action:
        - ec2:StartInstances
        - ec2:StopInstances
      Resource: "arn:aws:ec2:#{AWS::Region}:#{AWS::AccountId}:instance/*"
    - Effect: "Allow"
      Sid: CloudWatchLogging
      Action:
        - logs:CreateLogGroup
        - logs:CreateLogStream
        - logs:PutLogEvents
      Resource: "arn:aws:logs:*:*:log-group:/aws/lambda/${self:custom.LambdaFunctionName}:*:*"
The second main block is the "functions" block where we specify information regarding the Lambda Function and which S3 deployment bucket the ZIP code can be found in.
# serverless.yml

functions:
  main:
    handler: handler.main
    tags: # Function specific tags
      Name: ${self:custom.LambdaFunctionName}
    events:
      - http:
          path: ec2/start
          integration: aws_proxy
          method: post
          private: true
          request:
            parameters:
              querystrings:
                action: true
                region: true
                instanceId: true
            passThrough: WHEN_NO_MATCH
          response:
            statusCodes:
              200:
                pattern: '' # Default response method
Now with the handler.py and the serverless.yml files, we could go ahead and deploy with a simple command like
serverless deploy --stage dev
and a few minutes later our serverless project would be ready to use. But that would be too easy! We also want to go over some actual CI and CD tasks in this post, which may (or may not) mimic your own work environment.
Before we get started, I would like to mention one more thing about the Serverless Framework which is nice to have for the reasons outlined below, but we won't really use in this post. If you run the "package" command, then you will get a new directory named .serverless/ which will contain your zipped code package in the AWS Lambda structure, plus a CloudFormation template named cloudformation-template-update-stack.json. This would then enable you to run your CFT through some pre-deployment checkers like cfn-python-lint or cfn_nag should you have the requirement for such stages in your pipeline.
serverless package --stage dev
GitLab CI/CD
For the remainder of the post we are going to be implementing a small CI/CD pipeline, and we will take care of both the CI and the CD parts. For our CI portion, we will run our code through a code quality checker, and then we will run the deployment to AWS for the CD part. All of this will be automated just from pushing our commits to the appropriate branch.
Ensure that you have both a master and a develop branch in your GitLab project as we will impose CI/CD rules on both.
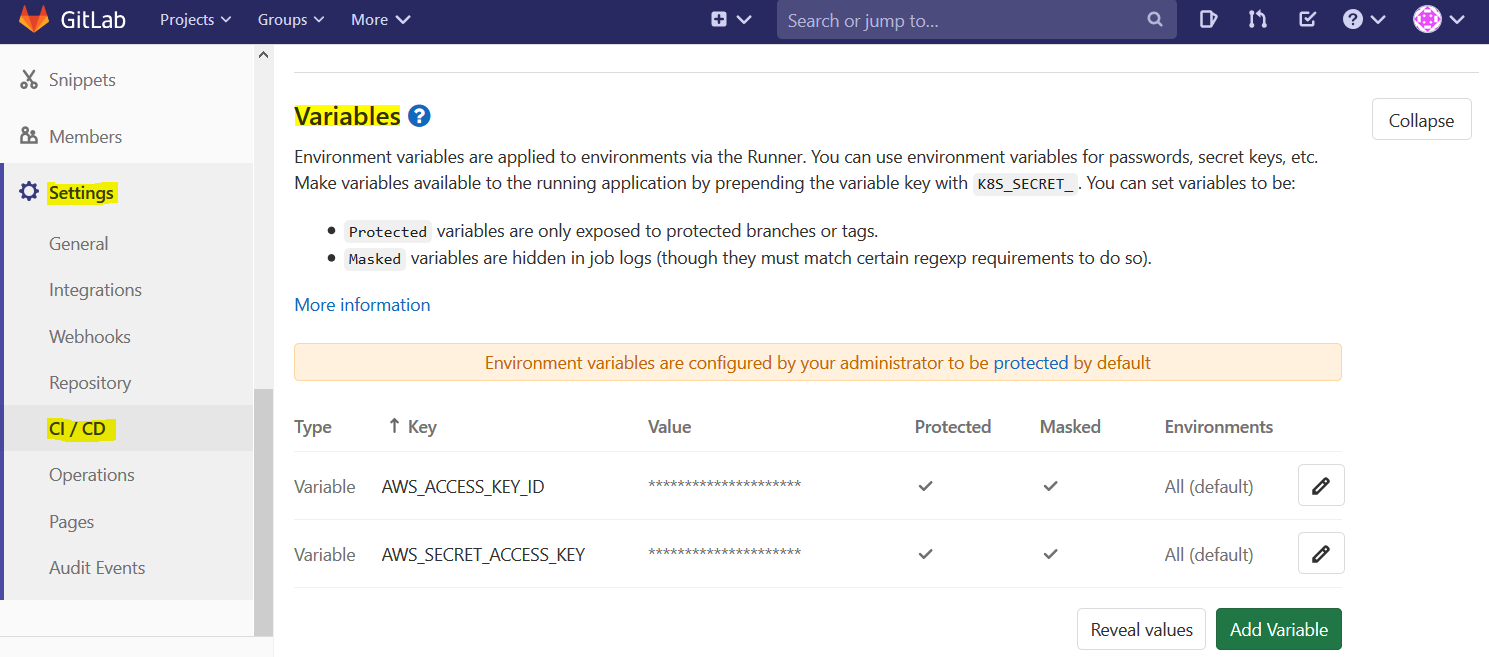
First we need to setup some AWS secrets as variables in our repo. These will be the secret ID and Key you get when you create a programmatic IAM user in AWS. Note that this user will need to have appropriate access for CloudFormation, IAM, Lambda, API Gateway, etc. In GitLab, navigate to the Settings --> CI/CD --> Variables section of your repo and create two new variables consisting of your secrets like shown below:
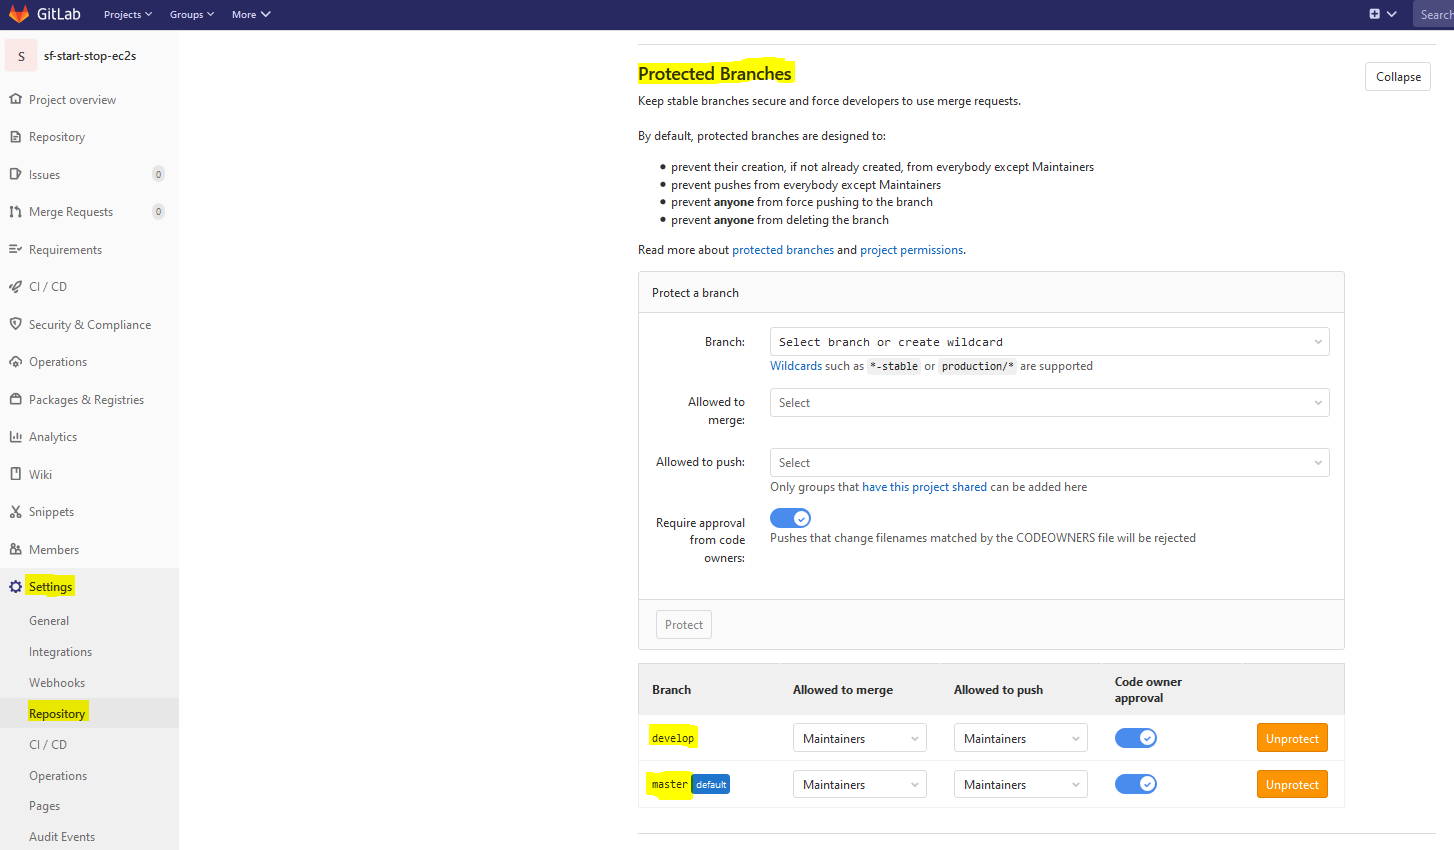
You might also need to configure your Protected Branches in GitLab. This is especially true if you are deploying to AWS using your secrets when pushing/merging to particular branches. You can configure your Protected Branches by navigating to your repo's Settings --> Repository --> Protected Branches and specifying settings like shown below:
Now, on the develop branch of your repo, create a file named .gitlab-ci.yml in the root of your project directory with the following contents:
image: node:12.18.3

include:
  - template: Code-Quality.gitlab-ci.yml

stages:
  - test
  - deploy

code_quality:
  stage: test
  artifacts:
    paths: [gl-code-quality-report.json]

prod_deployment:
  stage: deploy
  before_script:
    - npm install -g serverless
    - npm install --save-dev serverless-cloudformation-sub-variables
    - serverless config credentials --provider aws --key $AWS_ACCESS_KEY_ID --secret AWS_SECRET_ACCESS_KEY --stage v0
  script:
    - serverless deploy --stage v0
  environment: production
  only:
    - master
This configuration file specifies two stages to run through for our CI/CD pipeline. The first stage is the code quality checker that will run anytime we push commits to any branch in our repo. The second stage, "deploy", will automaticaly deploy our project to our AWS account only when we push/merge to the master branch. We could extend this to a number of different stages and actions to take depending on what all your environment's pipeline should consist of. This however, is enough to be considered a basic CI/CD pipeline, i.e. all developers have to worry about is writing code and committing their changes.
You may have notice the image: node:12.18.3 at the top of our .gitlab-ci.yml file. This is because GitLab CI/CD actually uses Docker Containers on the backend to run the commands in each of the CD/CD stages we define.
When you push this .gitlab-ci.yml file to your develop branch, the code quality checker job will kick off and a few minutes later you will be able to see the results. When you push or merge your code to the master branch, code quality stage will run first, and then upon completion your deploy stage will run. Within a few minutes you will be ready to make API calls with Postman to start or stop your EC2s like we did in the previous blog post.
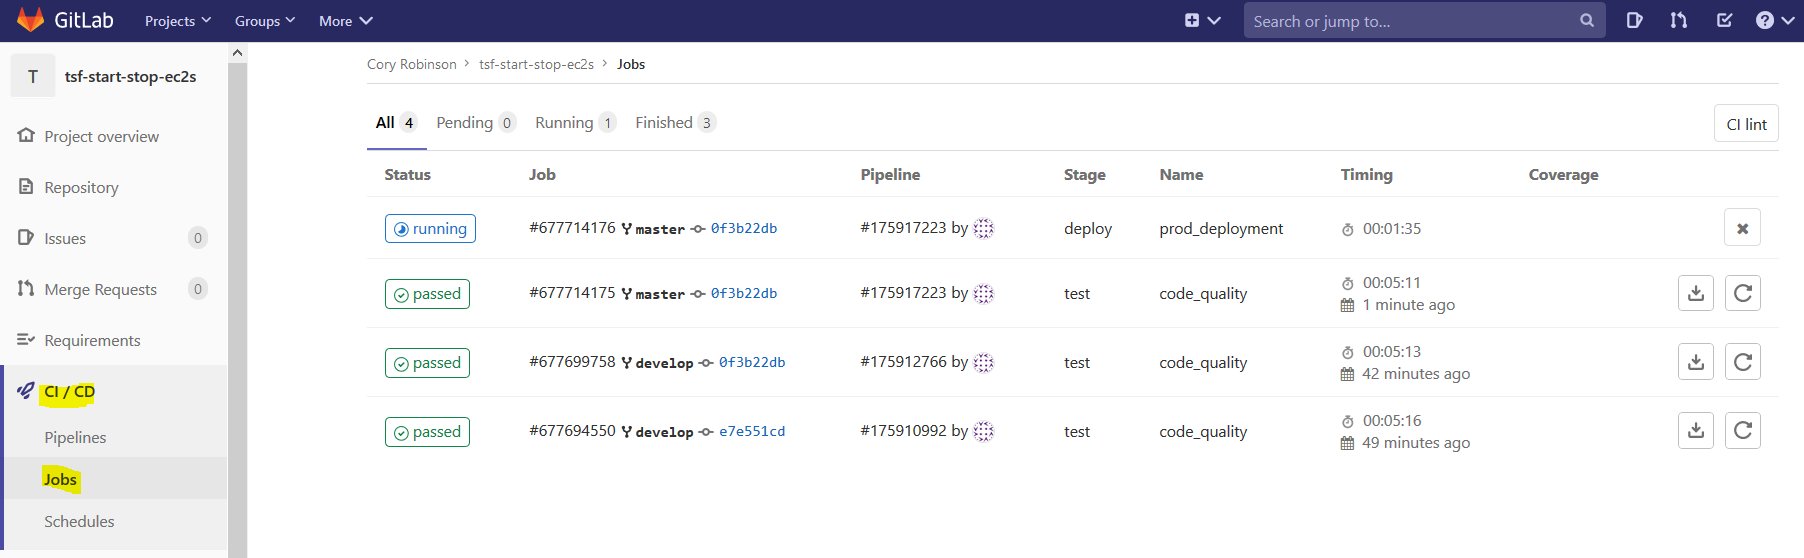
In GitLab you can navigate to the CI/CD --> Jobs section of your repo to see which Jobs have completed and which may still be running.
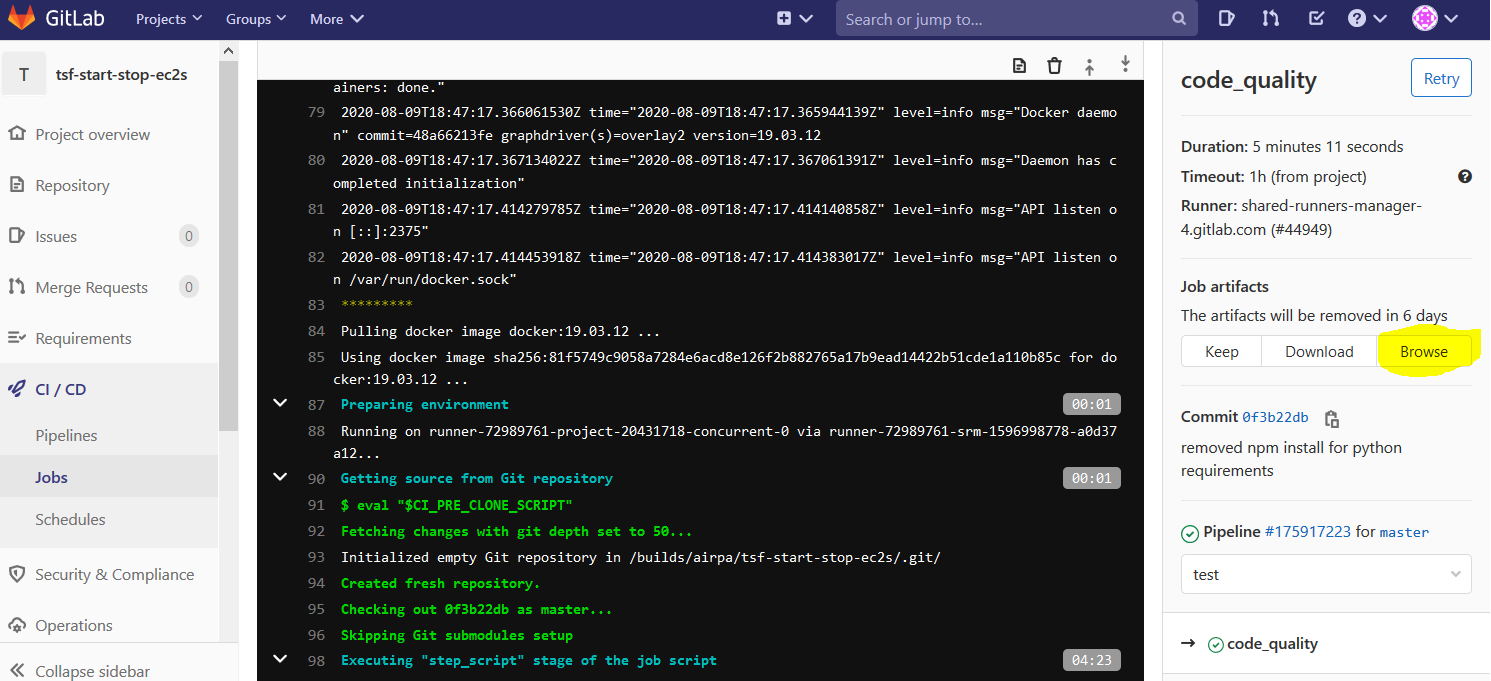
Click into one of these Jobs to get more details. If you click into the code quality job details, then you will find a "Browse" button which will lead you to the results of your code quality checker:
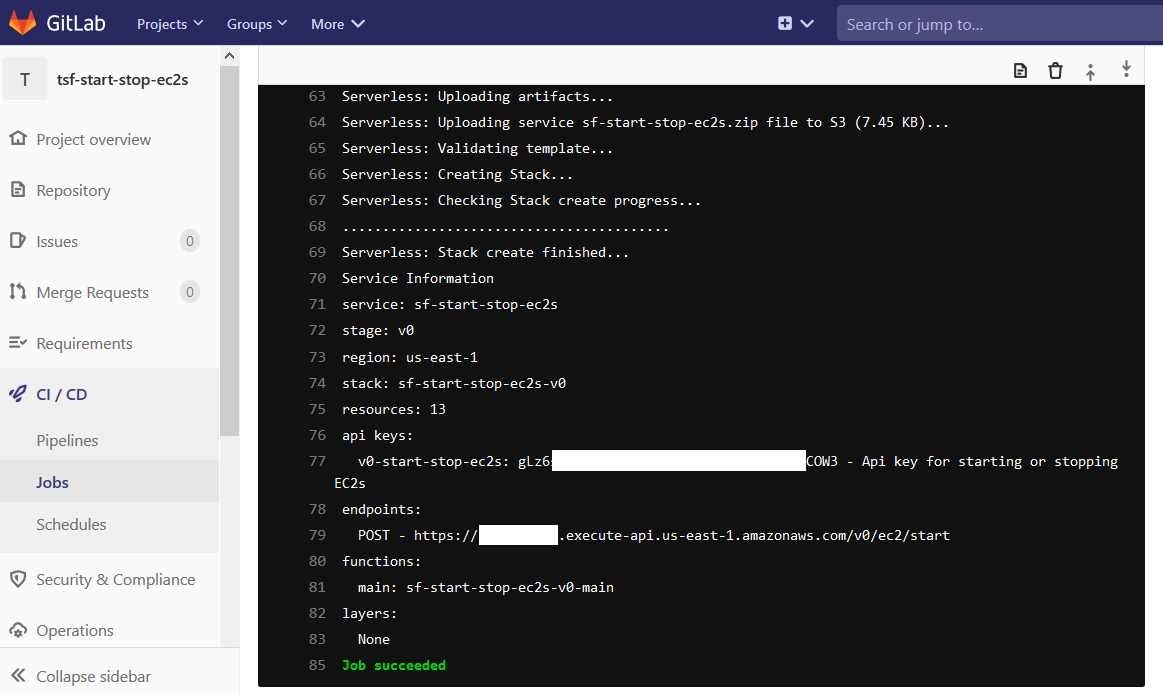
If you click into the details of your deployment job, you will find your API Key and API endpoint near the end of the stdout on the terminal pane:
And that's all we need to do for our simple CI/CD pipeline!
Wrapping Up
We have taken a look at using the Serverless Framework to build a simple serverless AWS project with API Gateway and Lambda Function components. Then we saw how easy it is to setup a CI/CD pipeline in GitLab for automating all of our integration and deployment steps. This was a complete end-to-end CI/CD solution, but of course you can include the infinitely more integration stages that your work environment might require so that developers can focus more of their work on actual development.
There are several other directions you could take with GitLab CI/CD. Maybe you would want to do something similar with a serverless project using SAM CLI, or maybe you could implement a CI/CD pipeline for your Kubernetes project. GitLab CI/CD offers integration solutions for your Kubernetes Clusters that you may have running on AWS EKS.
Wherever you go in your CI/CD or Serverless or Kubernetes journey, please automate everything as much as you can. It really makes things simple, and keeps developers happy!
Happy hacking!