

1/16/2020
You may have heard of entropy in your high school chemistry class or perhaps studied it in a thermodynamics course. Maybe you have even calculated entropy when studying machine learning algorithms. In simple terms, entropy can be thought of as a measure of randomness in an environment.
Consider, for example, the Earth's atmosphere which is comprised of various gases. There are many layers of air with different pressures and temperatures causing gas particles to bounce around in such a way that makes it difficult for your local weather station to predict. There is a lot of randomness and disorder going on here which is an indicator of high entropy.
Now, take a look at your coffee cup. Perhaps it's a nice piece of ceramic and when you pour your coffee into it, you expect it to hold up nice and sturdy without dissolving away and creating a big mess. The particles holding your cup together don't move around so much, and you never expect your coffee cup to transform into a different shape. This is an example of a low entropy system.
Your computer system also has a measure of entropy. Computer systems generate entropy from variables such as measuring the speed of spinning hard drives, mouse movements, and processes being spawned. A computer system's entropy is measured in bits. A low entropy computer system would tend towards the minimum of 0 bits. Generally, we find that 4096 bits is the highest level of entropy in computer systems, however, it is possible to set this number higher.
Why does a computer system need to have a measure of entropy? Cryptographic applications, such as generating RSA key pairs or secure website certificates, desire to have as much unpredictability as possible in generating prime numbers in order to lessen the chances of your keys being "guessed" and losing sensitive data. If there is little or no entropy on your system, then theoretically, secret keys being generated by a deterministic Pseudo Random Number Generator (PRNG) could be inferred, although it would be quite difficult to do so.
We will be discussing how applications make use of random numbers and entropy pools, particularly on Linux servers, and I will demonstrate a case where entropy can drop to zero and possibly cause problems with applications running on the system.
Linux Random Number Source Devices
There are two devices available to read random bytes from:
/dev/random/dev/urandom
The data on these devices are in binary format, and we can dump data from here in a couple of different ways. We could generate a random 2-byte unsigned integer using the "octal dump" command like
[ec2-user@ip-172-31-80-165 ~]$ od -An -N2 -i /dev/random
       29648
[ec2-user@ip-172-31-80-165 ~]$ od -An -N2 -i /dev/urandom
       63146
We could also generate random 32-bit strings of base64 encoded characters like
[ec2-user@ip-172-31-80-165 ~]$ head -c 32 /dev/random | base64
F43JVw4Ch6PsYyUd56pCBPPEdiOlNx1XuDCtof29884=
[ec2-user@ip-172-31-80-165 ~]$ head -c 32 /dev/urandom | base64
xNjgEKj+MURV5ik/M8W0fWEGwDB5GAb5xKTXMtwIdi8=
These devices use the same PRNG, and the big difference between the two is that /dev/random will block reads when the entropy pool is too low while /dev/urandom will never block.
Some will argue that /dev/random will give a better random number because it depends on there being enough entropy being available, whereas /dev/urandom will return values even if there is zero entropy available. Others will argue that this is just a myth, and that /dev/urandom is just as cryptographically secure as /dev/random.
Applications like OpenSSL will read data from dev/urandom to seed it's own PRNG. Frustratingly, some applications will read from /dev/random, and can cause headaches when trying to troubleshoot why the app is not running as expected when the available entropy is too low.
Linux Entropy
On Linux machines, you can find files that provide information about entropy in the directory
/proc/sys/kernel/random. Listing the files here, we have
[ec2-user@ip-172-31-80-165 ~]$ ls /proc/sys/kernel/random
 boot_id entropy_avail poolsize read_wakeup_threshold uuid write_wakeup_threshold
boot_idis a unique ID that is randomly generated on each system bootentropy_availis the number of bits of entropy available in the system, generally
0 <= entropy_avail <= 4096poolsizeis the maximum bits of entropy the system can generateread_wakeup_thresholdis a threshold such that if
entropy_avail >= read_wakeup_thresholdthen reads from/dev/randomwill not block.uuidcontains a random string in the form of
6fa42ba7-4ff1-3d5a-ad83-6fb93feb91f4write_wakeup_thresholdis a threshold such that if
entropy_avail <= write_wakeup_threshold, then writes to/dev/randomwill not block.
Examples
Let's take a look at a couple of real world examples of entropy on some Red Hat 6.9 servers that are loaded with an active web server and other applications that have heavy inbound/outbound TCP traffic.
A couple of observations here is that Server1 had huge swings in entropy, between 500 and 4000 bits, while Server0 struggled to jump above 2000 bits. Also, why did entropy go to zero bits on Server0 at around 3800 minutes? Let's dig into this a bit more by running an experiment.
Experiment
The Goal
We have two goals for this experiment.
- We want to see a practical example of how reads from
dev/randomcan block applications from executing further instructions. - Can we reproduce a scenario similar to Server0 above, where the entropy available drops to zero and indefinitely breaks applications relying upon reads from
/dev/random?
Prerequisites
We will be spinning up a lab environment in AWS, and to follow along in your own lab environment, you will need at minimum:
- an AWS account
- knowledge of creating and deleting CloudFormation stacks
- knowledge of how to interact with EC2s and S3 Buckets from the AWS Console
- aws cli installed on your local machine and linked to your AWS account
- very basic experience with Linux operating systems
Warning The lab environment we spin up in AWS includes some resources that cost money. While the charges will be small if you are briefly using the environment, it is advised to follow clean-up steps below to keep from incurring significant unintended charges to your AWS account.
The Setup
For this experiment we will spin up a couple of Red Hat virtual machines on AWS. The setup process is completely automated using a CloudFormation template (CFT) that we can run from the AWS Console. The CFT as well as some other code and data can be found in my Github repo.
AWS Resources
The following is a list of resources that will be provisioned which are defined in the CFT:
- EC2 - Red Hat 6.8
- Community AMI ami-1a0a540d in us-east-1
- Linux Kernel 2.6.32-642.6.2.el6.x86_64
- EC2 - Red Hat 8.1
- AMI ami-0c322300a1dd5dc79 in us-east-1
- Linux Kernel 4.18.0-147.3.1.el8_1.x86_64
- EC2 Security Group with ports 22, 80, and 443 opened
- S3 Bucket - provide your own bucket name at stack creation. This will hold data being pushed up from our EC2s.
- S3 Bucket Policy allowing access from the AWS root account and from the specified IAM role being created
- IAM Role for EC2 services
- IAM Policy allowing S3 PutObject actions
- IAM Instance Profile to attach to our EC2s being created
Go ahead and navigate to the CloudFormation service and Create Stack in your AWS Console. Upload the /cft/entropy_research_stk.yaml found in the Github repo and hit Next. You will need to fill in some parameters such as the name for a new S3 bucket, the name of an existing EC2 Key Pair, etc. Be sure to choose t2.micro as the EC2 instance type to begin with. Hit Next a couple more times to create the stack.
The stack creation will take a couple of minutes. In addition, there are some software updates and installations being performed on the EC2s which may take another 5-15 minutes before they are completely ready to proceed with our experiment. How do you know if the updates and installations are done? ssh into the EC2s and check the output of tail -f /var/log/cloud-init-output.log. If you don't see any errors and there is something similar to Cloud-init v. 0.7.5 finished printed in the shell, then everything should be good to go! Also, you should notice that there are a couple of python and shell scripts present in the /home/ec2-user directory.
The Execution (Part 1)
After the two EC2s are ready (according to /var/log/cloud-init-output.log, go ahead and list the files in the /home/ec2-user directory. You should notice
- entropy_check.py
- entropy_blocking.py
- run_entropy.sh
The python script entropy_check.py will run for five minutes and check the system entropy available every one second. When this script finishes, a .csv results file "RHEL[6or8]_entropy_results.csv" will be written out, and uploaded to the S3 Bucket we created with the CFT.
The script entropy_blocking.py will run a command to read 32 bits of characters from /dev/random and keep count of how many times a read succeeded without blocking.
The shell script run_entropy.sh will first execute entropy_check.py, and then 30 seconds later it will execute entropy_blocking.py.
Go ahead an execute ./run_entropy.sh and about five minutes later you should see a .csv file appear in the S3 Bucket for each EC2 that you ran the shell script on.
The Results
First let's look at the results for our RHEL6 instance. Once the blocking reads from /dev/random kicked in after 30 seconds, the entropy available dropped significantly.
The entropy available struggled to jump above the read_wakeup_threshold = 64 over the remaining four and a half minutes of the experiment, and the count of successful reads from /dev/random maxed out at 4 over the course of the experiment on the RHEL6 instance.
Interestingly, the results for our RHEL8 instance indicated a stable entropy pool. I tried a few other commands that would possible decrease the entropy pool, and the results hardly differed. I'm sure that some kernel patch between versions 2.6 and 4.18 are responsible for this, however I haven't been able to pinpoint the exact version. I did however find some recent discussions on entropy dropping to zero involving RHEL7.7 and kernel version 3.10 (https://bugzilla.redhat.com/show_bug.cgi?id=1715899).
There has also been active development on the Linux Kernel involving some refactoring and fixing of entropy accounting issues in the code for drivers/char/random.c which looks to have stabilized entropy issues quite a bit.
The Execution (Part 2)
We saw, at least in our RHEL6 experiment, how reads from /dev/random exhibit blocking. Now let's take a look at how we could possible cause entropy to drop to and persist at zero.
For this part of the experiment, we will be changing the EC2 Instance Type. We created the CFT Stack with t2.micro instances. A t3.micro instance is considered a "next generation upgrade" from a t2. These "next generation" instances are generally cheaper to run and have better performance capabilities compared to their older counterparts. Here, we will be upgrading to a t3.micro, however, you could choose to upgrade to any other type of "next generation" instance, e.g. c5 or m5, etc., with essentially the same results.
EC2 ENA Support
One thing we will need to consider when upgrading our instance type is the support for the Elastic Network Adapter (ENA).
Notice that the RHEL8 instance we spun up has ENA enabled, while the RHEL6 instance does not.

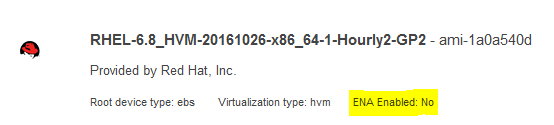
We will need take a few manual configuration steps to properly enable ENA on our RHEL6 instance.
Enabling ENA
While these particular steps may not be necessary on all Linux EC2s, they were necessary for this particular AMI of RHEL6.8
ssh into the RHEL6 EC2 and run the following set of commands:
$ sudo -i
$ yum install kernel-devel-$(uname -r) gcc git patch rpm-build wget -y
$ wget https://github.com/amzn/amzn-drivers/archive/master.zip
$ unzip master.zip
$ cd amzn-drivers-master/kernel/linux/ena
$ make
$ cp ena.ko /lib/modules/$(uname -r)/
$ insmod ena.ko
$ depmod
$ echo 'add_drivers+=" ena "' >> /etc/dracut.conf.d/ena.conf
$ dracut -f -v
More information on the above commands can be found here https://aws.amazon.com/premiumsupport/knowledge-center/install-ena-driver-rhel-ec2/. These instructions will install the necessary drivers needed for ENA support.
From your local machine, use the AWS CLI to run the following command which will complete the process of enabling ENA on the RHEL6 instance.
$ aws --profile airpa ec2 modify-instance-attribute --instance-id i-07b1f3da56749d643 --ena-support
Now that ENA is enabled, we can stop both EC2s and change the instance type from t2.micro to t3.micro.
Zero Entropy
After changing the instance types, we check the entropy available on both EC2s.
On the RHEL8 instance, we see that the entropy pool seems to be filled sufficiently.
[ec2-user@ip-172-31-86-1 ~]$ cat /etc/redhat-release
Red Hat Enterprise Linux release 8.1 (Ootpa)
[ec2-user@ip-172-31-86-1 ~]$ cat /proc/sys/kernel/random /entropy_avail
3087
However, the entropy pool on the RHEL6 instance appears to have a problem after the instance upgrade.
[ec2-user@ip-172-31-83-240 ~]$ cat /etc/redhat-release
Red Hat Enterprise Linux Server release 6.8 (Santiago)
[ec2-user@ip-172-31-83-240 ~]$ cat /proc/sys/kernel/random/entropy_avail
0
[ec2-user@ip-172-31-83-240 ~]$ cat /proc/sys/kernel/random/entropy_avail
0
[ec2-user@ip-172-31-83-240 ~]$ head -c 32 /dev/random | base64
^C
[ec2-user@ip-172-31-83-240 ~]$ head -c 32 /dev/urandom | base64
RKSN++fB87CXqlsLXThxUi/CoBAhReQN+o7cdXbzqc0=
[ec2-user@ip-172-31-83-240 ~]$ cat /proc/sys/kernel/random/entropy_avail
0
Notice that we needed to Ctrl-C out of our attempted read from /dev/random due to the zero entropy blocking, however the read from /dev/urandom returned without blocking.
Changing the instance type is one way to cause EC2 entropy to drop to zero, however there are probably other ways. We have experienced other cases in which entropy has dropped to zero and persisted without finding any root cause.
Remediations
There are several fixes to this problem, and this is a good article from the RedHat Developers blog that addresses various remediations.
One quick fix is to run the rngd service after installing the rng-tools package. This method, however, comes with a security warning in the RedHat Developers blog article, because this method basically tricks the system to use /dev/urandom as a source of entropy such that the entropy_avail will increase when in the actual entropy is decreasing. In our earlier example, the Server1 had used this method, and I would be curious to further explore the predictability and security concerns in using this method; perhaps this will be the source of a future blog post.
Cleanup
Let's clean up our AWS environment we spun up with CloudFormation so that we don't have a surprise bill at the end of the month.
S3 Bucket
Before we can automatically delete our lab environment, we need to empty the S3 Bucket we have been using. This is a necessary step before a CFT Stack can be deleted.
Simply navigate to S3 in the AWS Console and check the box next to your bucket.

After checking the box, look towards the top of the Console and click the "Empty" button.

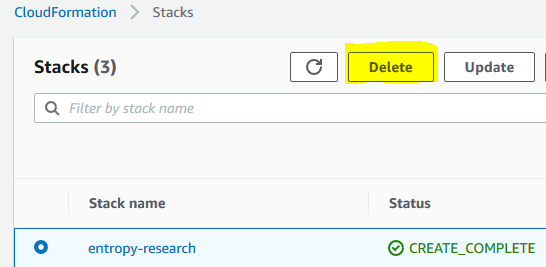
Delete Stack
Now that our S3 Bucket is empty we can navigate to the CloudFormation console, select the stack we created for our lab environment, and click Delete.
What Have We Learned?
We have introduced the theoretical concept of computer system entropy and demonstrated a way in which applications relying on reads from /dev/random could get hung due to there not being enough entropy available in the system. More so, this appeared to be valid on Linux Kernel versions at least older than 4.18.0-147.3.1.el8_1.x86_64. We also found that changing the AWS EC2 Instance type could potentially cause system to drop to zero and indefinitely persist at zero unless certain remediation steps are taken. Again, this only appeared to be valid with older versions of the Linux Kernel.
It is worthwhile to keep in mind that system entropy could potentially be the source of issues involving unexpected timeouts, or hung applications, especially if you are working with legacy applications running on legacy Linux machines.
While it would be a difficult problem to "hack" applications relying on /dev/random to secure communications, it theoretically wouldn't be impossible. It is likely okay for your applications to make use of /dev/urandom without sacrificing the security, and with that I will leave you with some interesting sources for further reading on computer entropy.
- https://bugzilla.kernel.org/show_bug.cgi?id=71211
- https://www.2uo.de/myths-about-urandom/
- https://www.blackhat.com/docs/us-15/materials/us-15-Potter-Understanding-And-Managing-Entropy-Usage.pdf
Happy Hacking!